The tutorial describes how to create your application using RingCentral Connect Platform API.
Create your application at Developer Portal following the steps:
Sign in to Developer Portal with your account login and password. If you do not have RingCentral account, please sign up.
Go to Console/Apps and click 'Create App' button.
Fill in the 'General Settings' form:
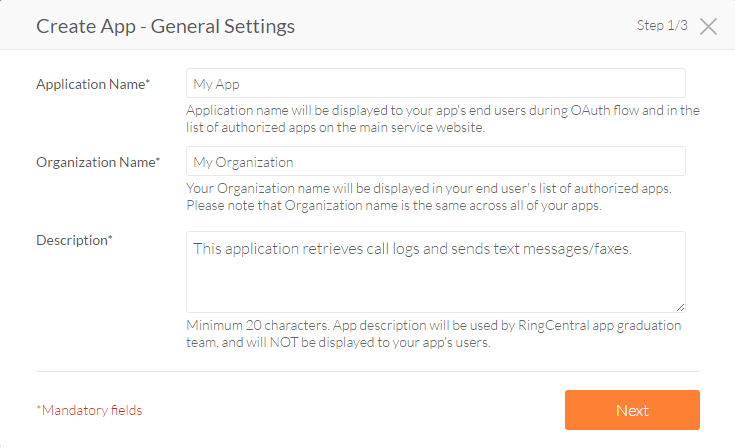
Application Name
Enter the name of your app.
Organization Name
Enter the name of your organization.
Description
Enter the text describing your app which is needed for app graduation only and will not be displayed to your app users. It should contain minimum 20 characters.
Continue by clicking the 'Next' button.
Fill in the 'App Type & Platform' form:

Specify the application type. Please take time to specify correct value as it is not editable after your app is created and affects Authorization flows available for your app.
You can choose one app type out of two:
Private — if you are developing an app for your own RingCentral account use;
Public — if you are developing an app for many RingCentral accounts.
Note: If you'd like to move from a private app to a public app, please submit a developer support request.
Select the application type from the list. Please take time to specify correct value as it is not editable after your app is created and affects Authorization flows available for your app.
You can select one platform type from the list:
Mobile (iOS/Android/Other) — native and hybrid mobile apps for iOS, Android and other mobile platforms.
Desktop (Mac/Windows/Other) — installable desktop apps including Windows, Mac and others. This includes Chrome apps.
Browser-based — in-browser, client-side apps that communicate with RingCentral APIs on the client, e.g. client-side JavaScript.
Server/Web — web-based apps are apps that communicate with RingCentral APIs from the server, e.g. Node.js, PHP / Laravel, Ruby on Rails, etc.
Server/Bot — chat bot apps built for Glip that communicate with RingCentral APIs (including Glip API) from the server side and can be running on your private or public network
Server-only (No UI) — if your app does not have any user interface please pick this option.
Authorization Flows
Authorization Flows available for your app are listed here.
Continue by clicking the 'Next' button.
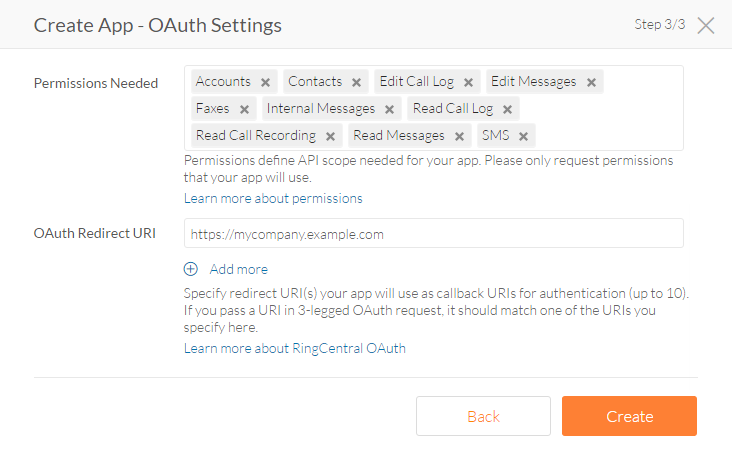
Select the permissions useful for your app from the drop list. And if your app will use Authorization Code Flow, specify the OAuth Redirect URI. Click the 'Create' button.
Your application is successfully created!
We provide you with Sandbox and Production environments to develop and test your app. Once you have created a new application Sandbox account is generated and Sandbox environment is already available. Production environment will be available upon application approval.
| Product Name | Sandbox URI | Production URI |
|---|---|---|
| Glip | https://app.devtest.ringcentral.com | https://app.ringcentral.com |
| RingCentral Online Account Portal | https://service.devtest.ringcentral.com | https://service.ringcentral.com |
| RingCentral API - Base URI | https://platform.devtest.ringcentral.com | https://platform.ringcentral.com |
Please note: Glip App (mobile or desktop) does NOT have:
support for the RingCentral Sandbox API (cannot switch to 'developer mode');
does not have a 'Sandbox version'.
Sandbox accounts are currently created at account level. We do not support creating multiple user level Sandbox accounts within a single RingCentral account. However once the Sandbox account is created and associated with your RingCentral account, you are able to use the Developer Portal to define as many new applications as you need.
The Sandbox environment provides a safe place for developers to build, test and fix their source code, being identical to Production, but without any risks.
The Sandbox environment helps:
our customers not to worry that a developer will make a change in a Production environment for their RingCentral integration which might introduce risk or potentially alter an operational state (unless they modify the code-behind, but that is outside of our control). This is especially important for our HIPAA-compliant customers.
RingCentral Connect Platform Team to improve developer experience over time and to prevent some customers' actions who would have unknowingly violated our company's EULA or TOS had they continued forward with their integration in Production without us being more engaged in the process. It has provided us the ability to monitor how people use the Platform and to make improvements.
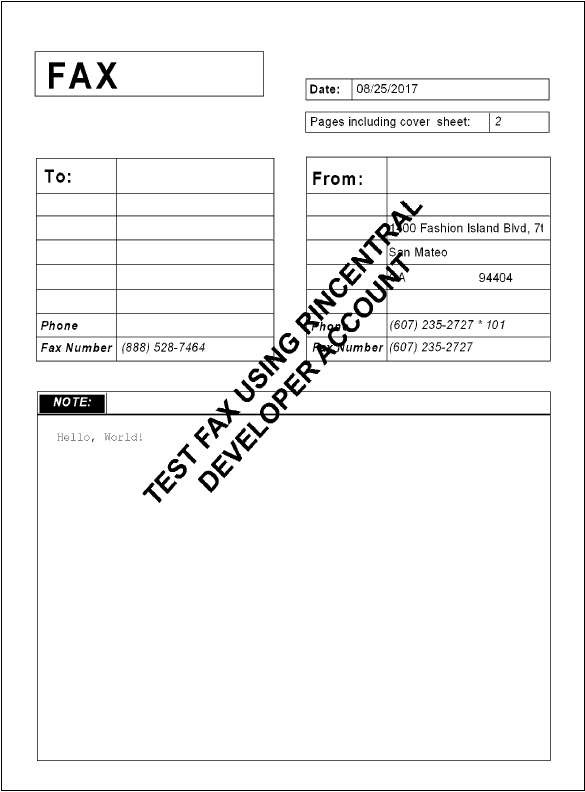
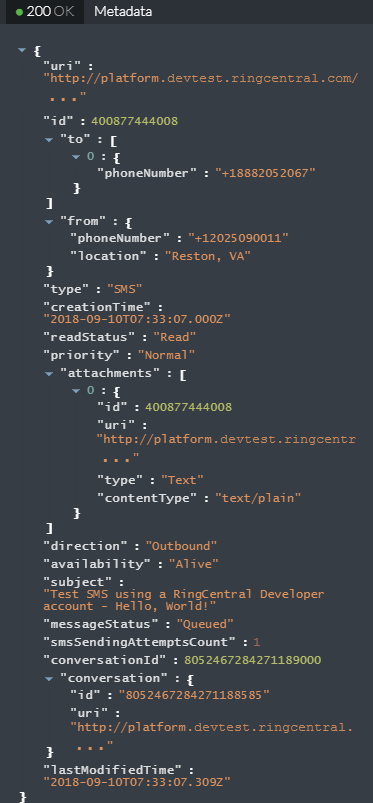
In order to ensure that Sandbox environment is used for testing purposes only, the following watermarks are added to messages and voice calls employing Sandbox environment:
SMS (Inbound/Outbound) - text watermark 'Test SMS using a RingCentral Developer account'
Voice calls (Inbound/Outbound) - voice watermark 'Test call using a RingCentral Developer account'
Faxes (Outbound) - image watermark 'Test fax using a RingCentral Developer account', see the image below:
Let's configure your development environment.
To configure your Sandbox environment please follow the steps:
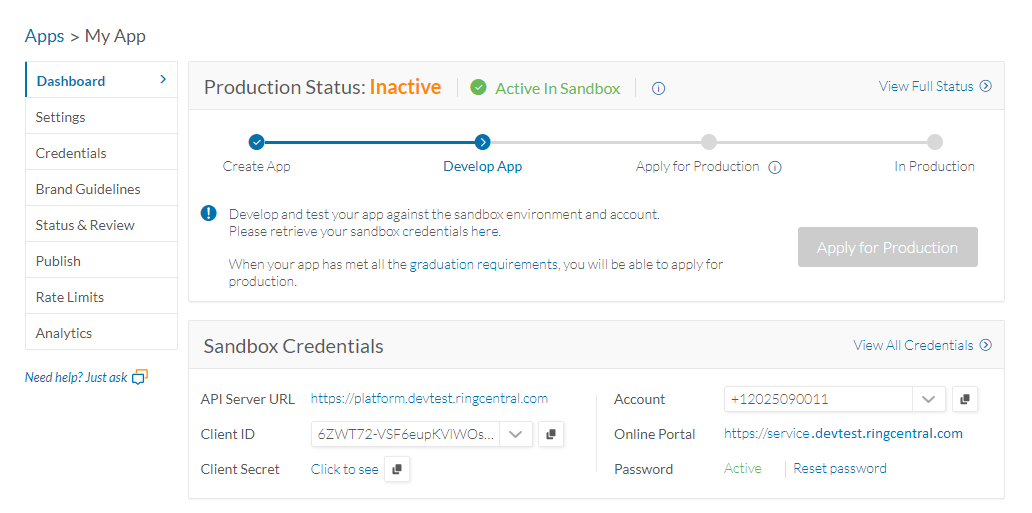
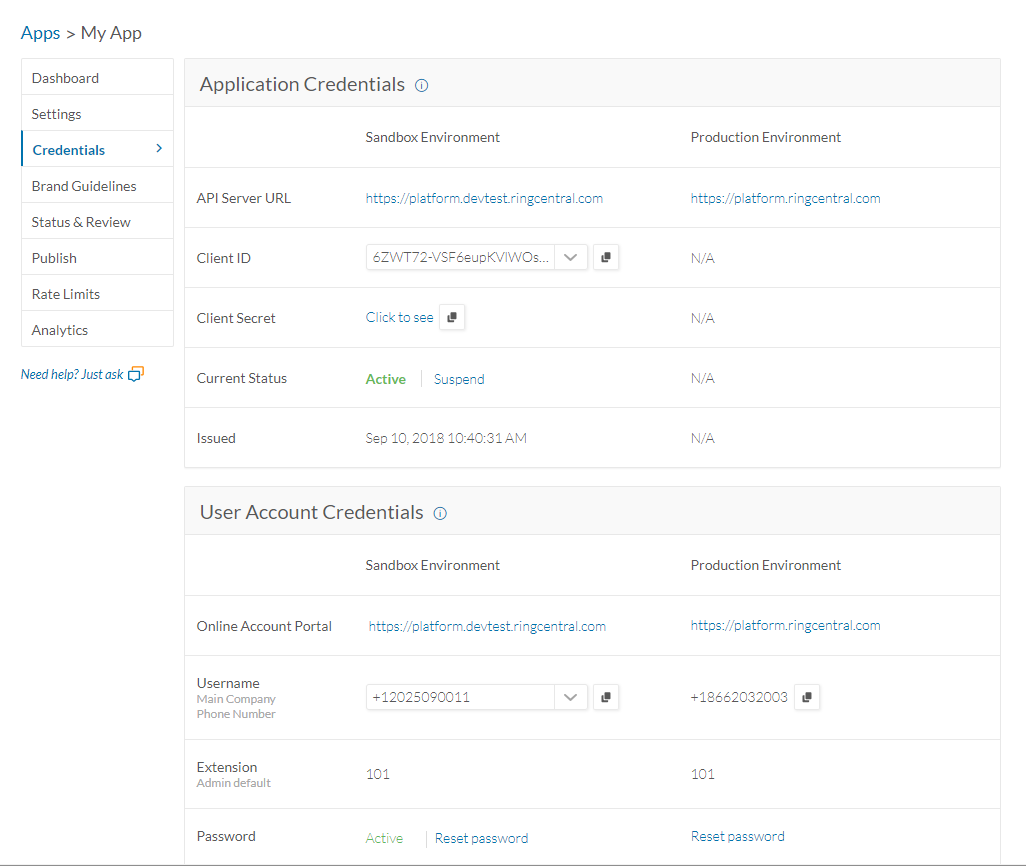
Login with your sandbox account username (main company number) and password that are available on your App page:
in ‘Sandbox Credentials’ section on the ‘Dashboard’ tab (see above);
in ‘User Account Credentials’ section on the 'Credentials' tab (see below).
Configure user account phone system to emulate your target user environment:
set auto-receptionist and company info;
add extensions and phone numbers;
add and set devices;
etc.
For more details please visit our Learning Center.
Your Sandbox account is ready to be used on Sandbox environment at
https://platform.devtest.ringcentral.com
The RingCentral Phone application can be used to test check integration of your app with RingCentral communications services.
Download RingCentral Phone from our RingCentral App Gallery.
Please note: By default the desktop application is configured for Production. When testing you should reconfigure it for Sandbox, following the steps:
Launch the downloaded application.
When the login screen is displayed press Cntrl+F2 (for Mac Fn+Command+F2).
Press 'Sandbox' in the pop-up menu and sign in with your sandbox account credentials.
The best way to start working with the RingCentral API is to discover the API list and make some test API calls with the API Reference which allows trying out RingCentral specific requests.
You may also use other REST compatible tools, for example:
Please note: The base URL for sending requests in
Sandbox is https://platform.devtest.ringcentral.com.
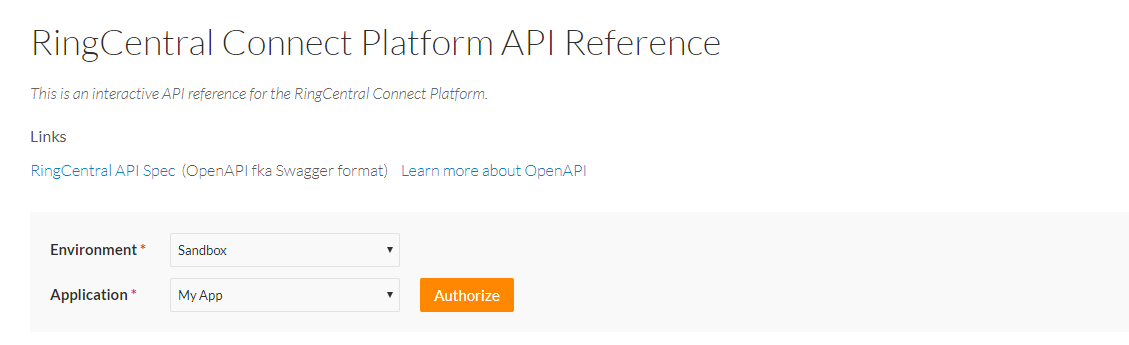
To start using the API Reference you should be signed in to your RingCentral developer account.
1. Click the 'Sign in' button to login to your RingCentral developer account.
2. Select your environment and application, then click the 'Authorize' button (for more details see Authentication & Authorization).
Please note: The issued access token is used for the next API requests automatically until token expiration; when it expires you just have to authorize again.
Go to Create SMS Message section.
Enter the sender and receiver phone numbers and the text of a message.
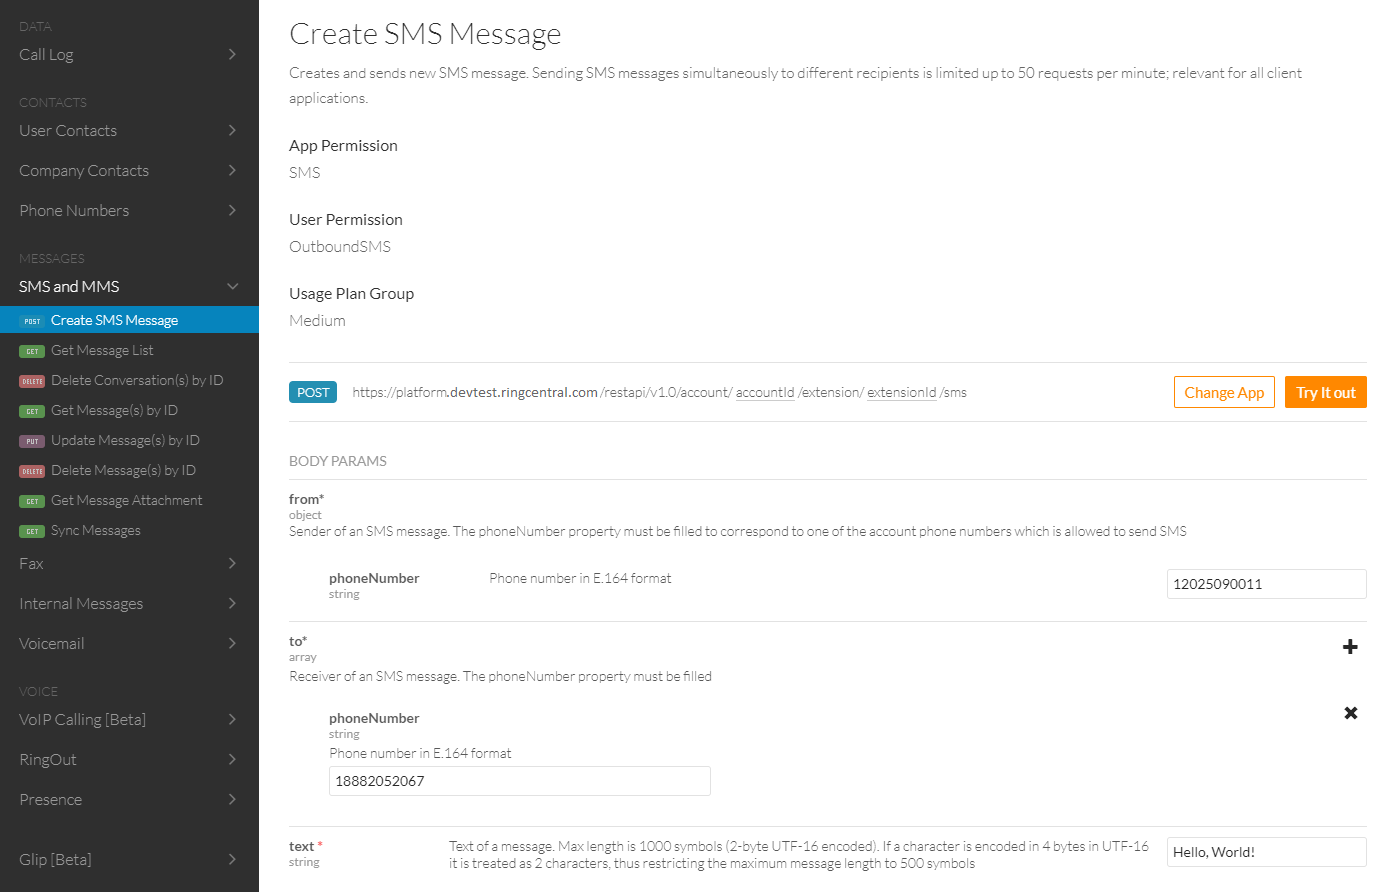
Click ‘Try it out!’ and get the sent message in response.
When your app is ready to work in production, please follow the RingCentral app graduation process. The process is designed to ensure that your RingCentral integration works properly and will not cause any bad experience for RingCentral users.
You will be able to click the 'Apply for production' button as soon as your app fulfills the following graduation requirements which cover the last two days (UTC timezone) — yesterday and today. The following requirements are necessary to apply for production:
5+ successful API calls per each endpoint used (20+ in total)
Your app is required to send 5 or more successful API requests to each endpoint it uses, but the total number of successful API requests should be 20 or more.
For example, your app uses only two endpoints:
.../extension/{extensionId}/call-logand.../extension/{extensionId}/presence.You need to make 5+ successful requests to each of these endpoints within the last two days, and the total number of requests within these two days should be 20+.
Let’s say yesterday you’ve made 3 requests to call-log endpoint, and 3 requests to presence endpoint. Then today you can make 2 requests to call-log endpoint (to make it 5) and 12 requests to presence endpoint (to make it 20 in total) to pass.
Please note: OAuth 2.0 requests are not included in these API counts.
Less than 5% of API calls result in 4xx errors
Please make sure that you receive
4xxerrors (400, 404, 429, etc.) in response to less than 5% of your API requests during the last two days.Exercise of all requested permissions
You can request permissions for your app upon app creation and during app development process, but please make sure that you request only the permissions your app will use in current version.
We ask you to have made API calls for using all the permissions you have requested, which mean that your app should make at least 1 API call per each permission it has along the minimum API calls per endpoint above.
For example, you have requested three permissions when you created your app:
ReadCallLog,SMSandReadMessages. After you have completed development, you realized that your app usesSMSandReadMessagespermissions, but you are not going to be usingReadCallLogpermission in the first version of your app.To graduate your app, you should remove the
ReadCallLogpermission from your app and make at least one API call per each of the permissions you need (within the last two days).All the requirements above are calculated automatically. You can check your app performance against them in the Status & Review section.
Once your app meets the above mentioned requirements you will be able to apply for production.
You will not be able to change your app settings after you apply, so please check that they are all set to proper values. Make sure that your app has a detailed description, listing its integration purposes and use cases.
Reviews are conducted Monday-Friday, for each prior business day's production application requests. Weekend and holiday requests will be reviewed the next available business day.
Please note: Public apps undergo more rigorous testing and review since they can be distributed to many RingCentral accounts. Please ensure you have full descriptions for a quick review. Additionally, we request that you beta test your public app with at least one customer after moving to production before broad distribution to exercise the flows with a different RingCentral account.
Once your app is graduated for production, you will receive an email. After that, make sure to change API server URLs and credentials you have been using for sandbox development to production ones (see Credentials section), and you are all ready to go!
Now when your app has graduated for production you can publish it.
Please open the 'Publish' tab on your app page and fill in the App Info form, see the image below.
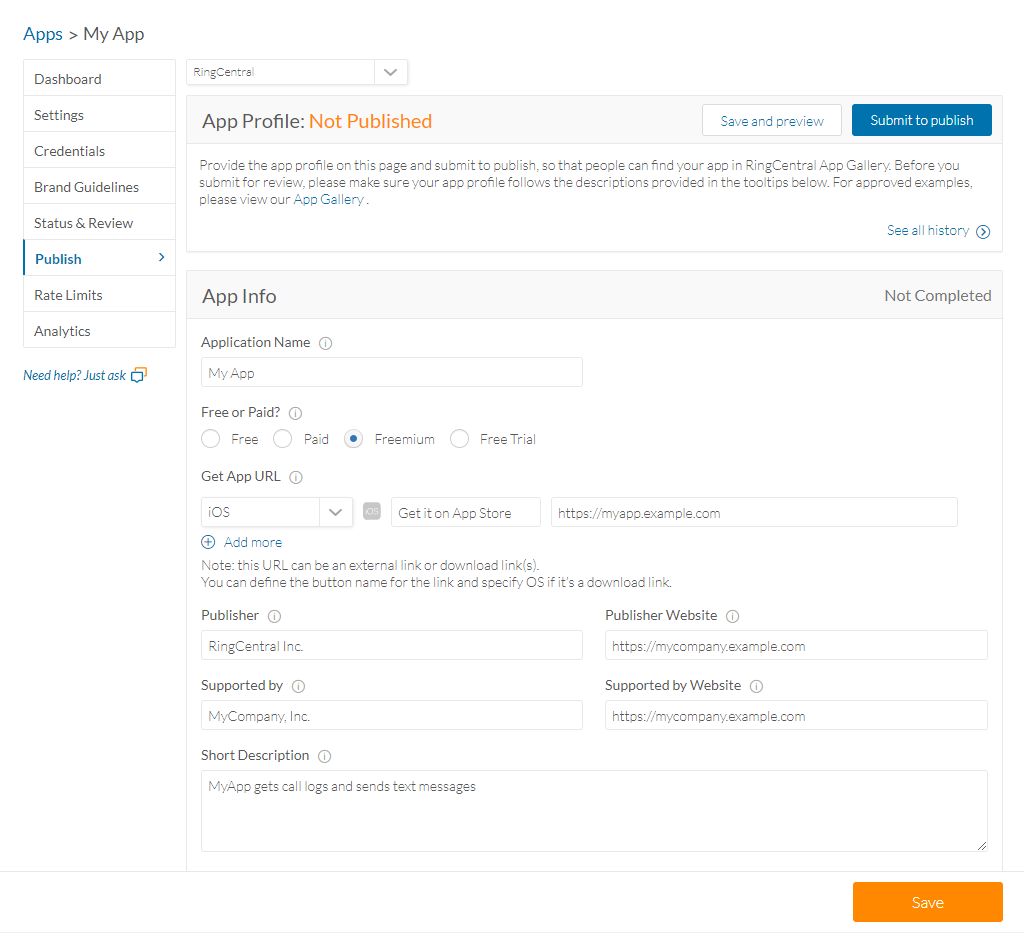
All this information is mandatory and official, it will be displayed in the App Gallery. You can also upload the logo and screenshots of your application in the 'App Logo' form.
Please click the 'Save' button to update your application data.
After you have entered all the information describing your brand new app, you can preview it by clicking the 'Save and preview' button.
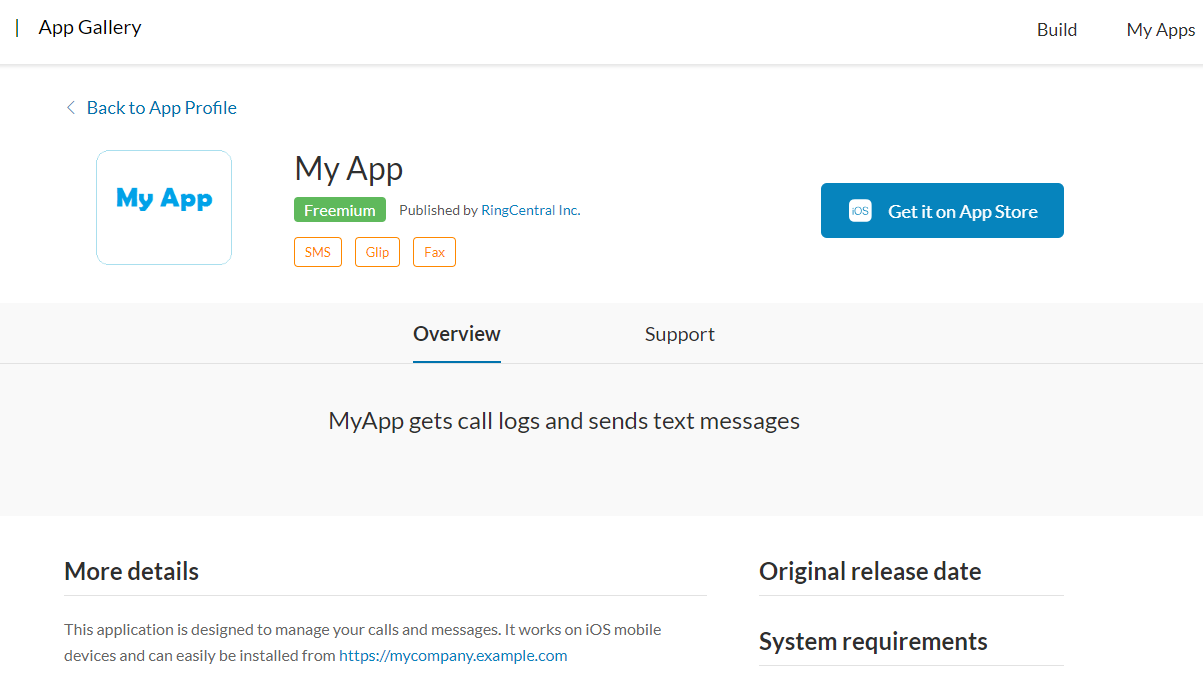
If everything looks fine, you can click the 'Submit to publish' button for your app publication. Please note: After the app is submitted for publication it is impossible to edit any data.
Congratulations! Your app is now published in App Gallery.