RingCentral Video Client SDK Quick Start

RingCentral Video REST API and Client SDKs are in beta
The RingCentral Video REST API and Client SDKs are currently in beta. Developers should be aware of the following:
- Their feature sets are not reflective of the full scope currently planned.
- Backwards compatibility is not guaranteed from one release to the next during the beta period. Changes can be introduced at any time that may impact your applications with little notice.
- Video APIs are not currently available in our sandbox environment and developers are asked to do development in our production environment.
Welcome to the RingCentral Platform. RingCentral is the leading unified communications platform. From one system, developers can integrate with, or build products around all the ways people communicate today: SMS, voice, fax, chat and video.
In this Quick Start, we are going to help you create your first application powered by a RingCentral Video Client SDK in just a few minutes. Let's get started.
Create an application and obtain app credentials
The first thing you need to do is create an app in the RingCentral Developer Console. This can be done quickly by clicking the "Create Video App" button below. Just click the button, enter a name and description if you choose, and click the "Create" button. If you do not yet have a RingCentral account, you will be prompted to create one.
Create Video App Show detailed instructions
- Login or create an account if you have not done so already.
- Go to Console/Apps and click 'Create App' button.
- Select "REST API App" under "What type of app are you creating?" Click "Next."
- Under "Authentication" select "Password-based auth flow."
- Under "Security" add the following permissions:
- Video
- Under "Security" select "This app is private and will only be callable using credentials from the same RingCentral account."
When you are done, you will be taken to the app's dashboard. Make note of the application's Client ID and Client Secret. We will be using those momentarily.
Obtain a JWT credential
Your application will need to be able to call the RingCentral API. The sample application you will be using in this quick start, will authenticate via JWT. Create a JWT credential, and copy it to your clipboard.
Using JWT credentials
JWT credentials are associated with an individual and are created in the Developer Console in your Credetials area. The individual with whom the credential is associated will be the host for all the meetings initiated by this quick start guide. In real life, you would want to either prompt users to login using the OAuth auth code flow to obtain an access token for each of your users, or schedule your meetings on behalf of others so that they are assigned as the host of the meetings being initiated.
Create a meeting bridge
This quick start will allow you to join a meeting. Therefore, you will need to first create a meeting bridge in which a meeting will be hosted. You can think of a "meeting bridge" as a virtual room in which meetings occur. One can create a meeting bridge in one of two ways:
- RingCentral App (recommended). The RingCentral App is our unified communications client, and provides a way for anyone to create a bridge using a simple user interface.
- REST API. Using the REST API, developers can create a bridge in which a meeting will be hosted using a few lines of code.
To join a meeting you will need to know the meeting's "web PIN." The bridge's pin is a numeric code often found at the end of the bridge's join URL. For example, if the bridge's join URL is:
https://v.ringcentral.com/join/0123456789
Then the web PIN is 0123456789. Make note of this pin, as you will use it later to start/join a meeting.
Run the sample application
Please use production credentials to call the Video API
RingCentral Video is not currently available in sandbox. To successfully call the API, please do development directly in our production environment.
Clone the Video Client SDK sample application repository
% git clone https://github.com/ringcentral/ringcentral-videosdk-js-samples.git
Install the SDK and prerequisites
% cd ringcentral-videosdk-js-samples/basicMeeting
% yarn install
Edit app.config.js
Look for the variables below and enter the appropriate values you obtained above for each of the following:
clientIdclientSecretjwt
Run the sample applicaton
yarn install
yarn run dev
Finally, open your browser to https://localhost:9000/ to create or join a meeting.
Check prerequisites
Check to make sure you have all of the following prerequisites:
- Xcode 13
- iOS device or simulator running iOS 10.0+
- Confirm that your iPhone is connected to your development machine if you are building on a physical device
iOS Simulator limitations
The iOS simulator may have limited functionality with respect to video and audio. Additionally, the project may not build on Macs using the Apple M1 CPU.
Clone the Video Client SDK sample application repository
% git clone https://github.com/ringcentral/ringcentral-videosdk-ios-samples.git
Install the SDK and prerequisites
% cd ringcentral-videosdk-ios-samples/QuickStart
% pod install
Edit QuickStart/AppConfig.swift
Look for the variables below and enter the appropriate values you obtained above for each of the following:
ClientIdClientSecretPersonalJwt
Build and run the sample application
- Open Xcode
- Open the sample app by clicking "File" > "Open." Then, open the
samples/QuickStartfolder - Ensure your Apple Developer "Team" is populated under "Signing & Capabilities"
- Select your target device (if you don't see your device, make sure it is physically connected to your development machine)
- Click the "Build" button (the right triangle)
- After the app has successfully started, join a meeting. To do that, enter the web pin of the meeting bridge you created in a previous step.
- Sign in and participate in the meeting.
Troubleshooting
Dealing with an iOS provisioning error
If you receive an error related to iOS provisioning, please make sure you are using an active and valid Apple developer account setup. In addition, make sure the "Bundle Identifier" string you are using is unique for your app.
Check prerequisites
Check to make sure you have all of the following prerequisites:
- Android Studio 4.2.+
- Physical Android device (Phone and Tablet) with Android OS 7.0+
Clone the Video Client SDK sample application repository
% git clone https://github.com/ringcentral/ringcentral-videosdk-android-samples.git
Edit strings.xml
Navigate to the strings folder:
% cd ringcentral-videosdk-android-samples/blob/main/samples/QuickStart/app/src/main/res/values
Then edit strings.xml, and edit the following string values using the values you obtained above:
<string name="clientId"></string>
<string name="clientSecret"></string>
<string name="personalJwt"></string>
Edit build.gradle
Add the following to your project's build.gradle file:
allprojects {
    repositories {
        ...
        maven { url 'https://s01.oss.sonatype.org/content/repositories/releases' }
    }
    dependencies {
        ...
        implementation "org.jetbrains.kotlin:kotlin-stdlib-jdk7:1.5.20"
        implementation 'com.pubnub:pubnub-gson:4.29.2'
        implementation 'com.ringcentral.video:ringcentral-video-sdk:version'
    }
    ...
}
Build and run the sample application
- In Android Studio open the
samples/QuickStartfolder found in the SDK. - Let gradle download and sync the dependencies for the project.
- From Android Studio's menu bar, click on "Build > Clean Project." Confirm there are no errors and then select your Android Device or AVD and click "Run app."
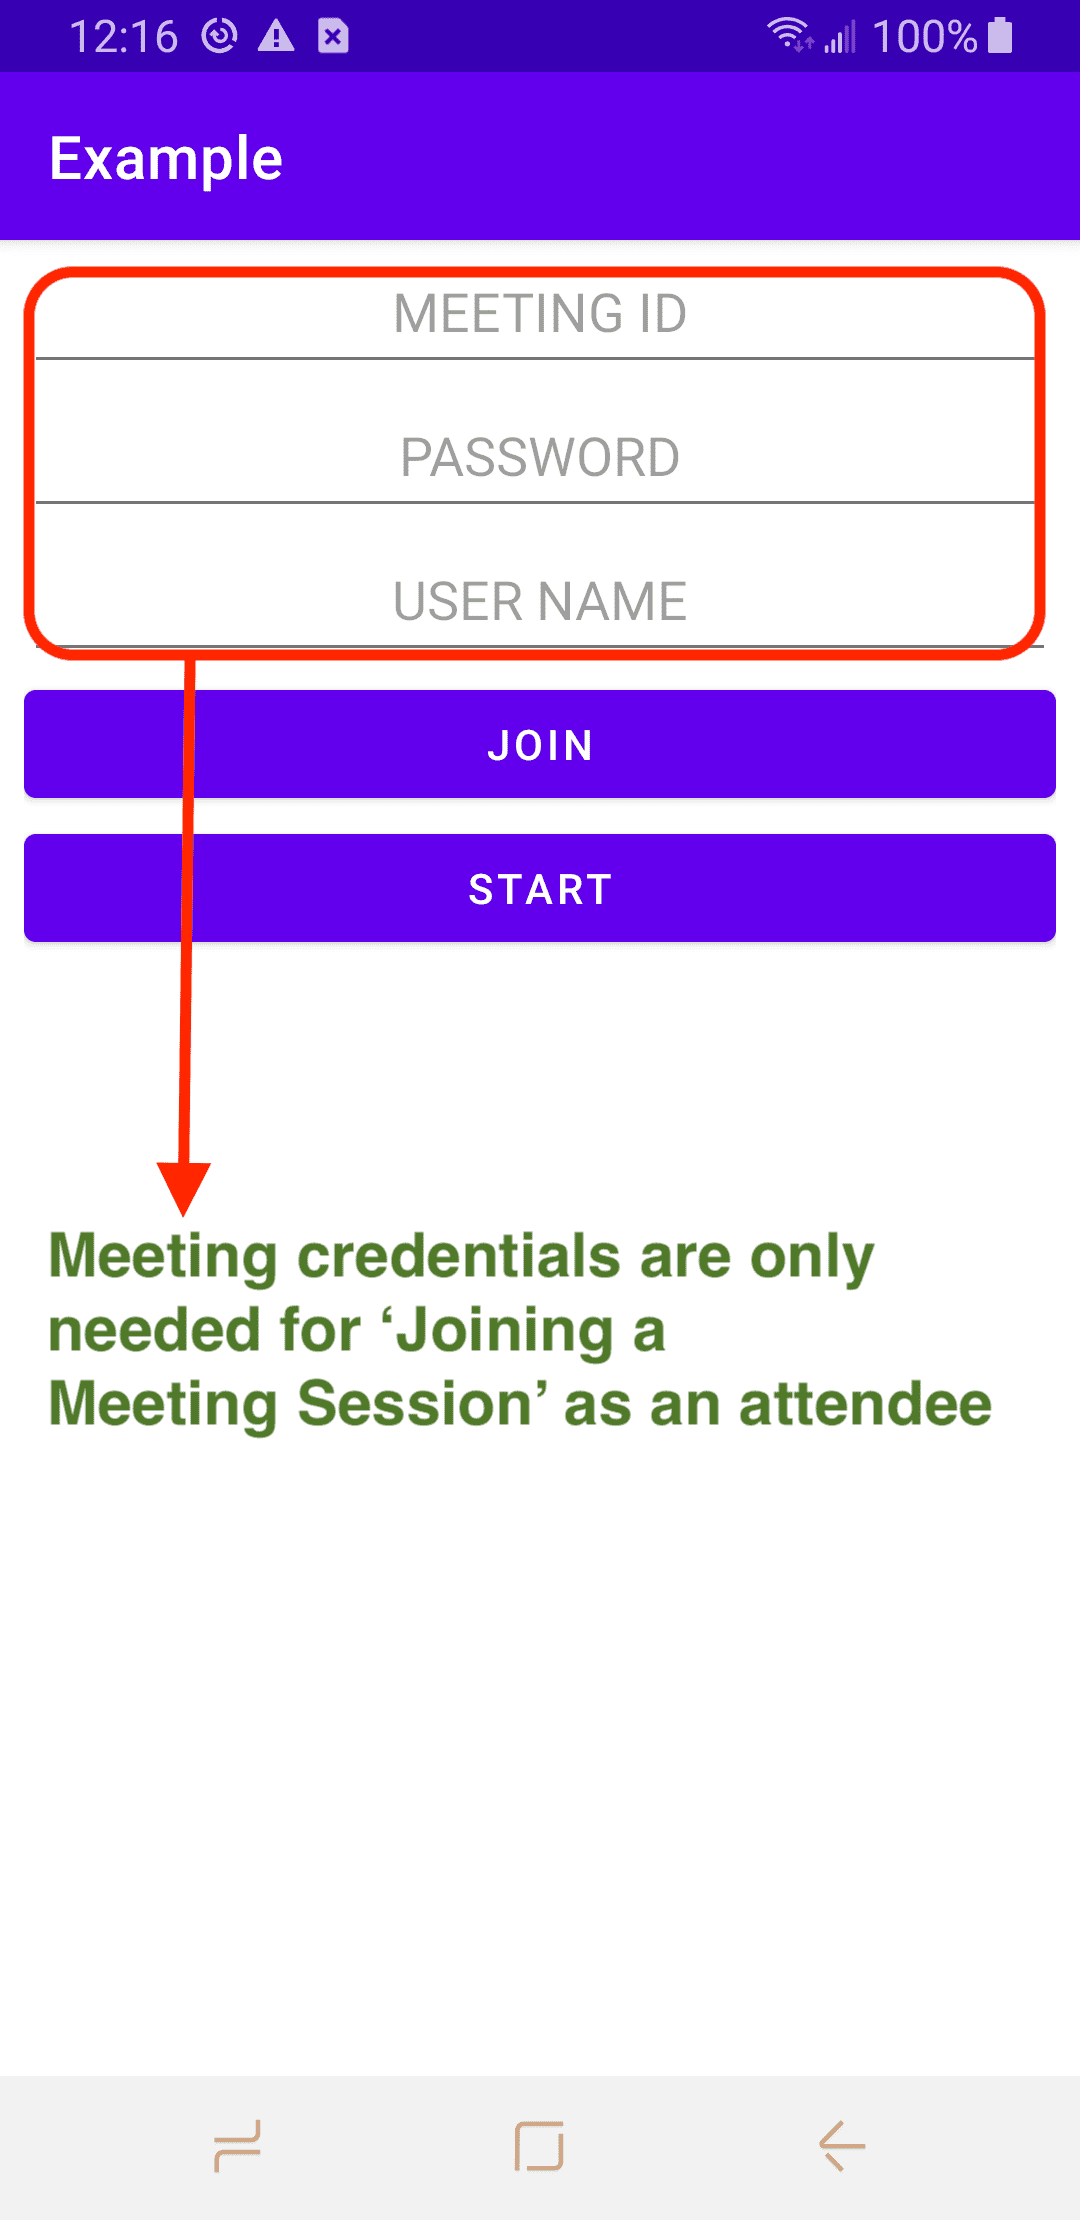
- Give time for the sample application to launch on your device, then tap on "Start."
- Invite a friend or colleague to join the meeting you created.